|
How to add a photo to your listing
Step 1 - Choose your Equipment
Make your item description come to life with a clear, vivid photo. Here are some
tips for getting started.
| What will you use to create a digital photo of your item? |
 |
Digital camera: a digital camera lets you
snap a picture of your item and immediately have it in digital format,
ready to edit with your computer. Your digital camera will come with
instructions on how to transfer (upload) photos to your computer. |
 |
Regular camera and scanner: take a picture
with a film camera, have it developed, and then use a scanner to convert
your picture into an electronic image. You may be able to place small,
flat items like stamps or jewelry directly in your scanner (and not need
a camera).
Note: Many copy centers such as Kinkos or Mail Boxes Etc. can do the
scanning for you. |
 |
Film-to-digital-image service: you can get
digital images made from your rolls of film with digital image services.
You may be able to access your digital photos on a CD or on the Web.
|
|
Step 2 - Create a Great Photo
Here are some tips from experienced HubSwirl's sellers for taking photos
that will make your item look its best and buyers confidence!
 |
 |
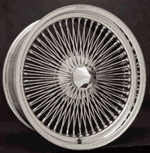
| Good:
Shows nice detail. |
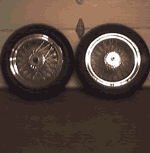
Bad:
It's crowded, backlit, confusing! |
- Use proper lighting. Many people find natural, outdoor lighting best.
Indoors or out, light your item thoroughly.
- Consider a backdrop. If appropriate, consider using a plain, colored
fabric backdrop to make your item stand out. Don't use pure white, as it tends
to create too much contrast in your photo. If you don't use a backdrop, be
sure to move other things out of the way so your item will really stand out.
- Get close up! Buyers want to see detail, so really make your item take up
the whole frame. Consider taking a close-up of a section of the item in
addition to the entire object in order to give buyers a better idea of the
item's actual condition.
Step 3 - Edit Your Photo
Once your photo is on your computer hard drive, you can often improve it with
photo editing software, which may have come with your digital camera or scanner.
You can also download basic editing software from sites like Tucows and
Shareware.com.
Tips:
- Remove unnecessary background.
- Balance the contrast and brightness.
- Save your edited picture as a JPEG(.jpg) file (file types other than JPEG
and
- GIF should not be used). Here's how (in most programs):
Choose Save As from the File menu.
Name your file.
Select JPEG (.jpg) or GIF (.gif) from the Save as Type drop-down list.
Planning on hosting your own picture? File size should be under 50 KB
(kilobytes) for quick page downloads.
Note: Selecting JPEG or GIF will automatically end your filename with ".jpg"
(for example, carphoto will now be carphoto.jpg ).
Step 4 - Copy Your Photo To The Web
There are two ways to get your picture onto the Web so you can include it in
your Shopolu listing:
Use Shopolu's Picture Services
When you use Shopolu's Picture Services, Shopolu's keeps and
displays your pictures for the length of your listing. You'll also be offered
enhanced options just for Shopolu's Picture Services users, such as a
picture thumbnail preview in listings and search results and main page gallery
rotation. Shopolu's offers FREE image hosting up to four images.
Host your picture elsewhere
Perhaps your Internet Service Provider (ISP) gives you some space on the Web
where you can store your pictures. Or maybe you'd like to try out
picture-hosting services like Pongo, Twaze, or PixHost. The Sell Your Item form
has a field where you can enter the Web address (URL) of a picture stored on the
Web. That picture will be displayed in your listing. To display more than one
externally hosted picture on Shopolu, you'll have to use HTML in your
listing.
File transfer software, such as WS_FTP for PCs (includes Shopolu's
user reference guide) or Fetch Softworks for Macs will assist in uploading your
picture file to your ISP or hosting service.
Step 5 - Add Picture On Post New Item Form
For Web Hosting
Click on the Web Hosting link to enter the Web address of your hosted picture.
This Web address (or URL) will look something like this: http://www.host.com/yourfolder/photo.jpg.
You can test the address by typing it into a separate window of your browser. If
your picture appears, it works! If not, double-check the address.
If you're using Web Hosting, you're done with this tutorial. Happy selling!
For Shopolu's Picture Service
To add a picture using FREE Image Hosting Picture Services, click the Browse
button and locate your file on your hard drive. do the same for each picture you
are willing to upload and continue the selling process.
Now your picture is on the Web and ready to help your item sell!
|